
- Home
- About Us
- Partners
- Support
- Reference Sites
- Solutions
- Language:
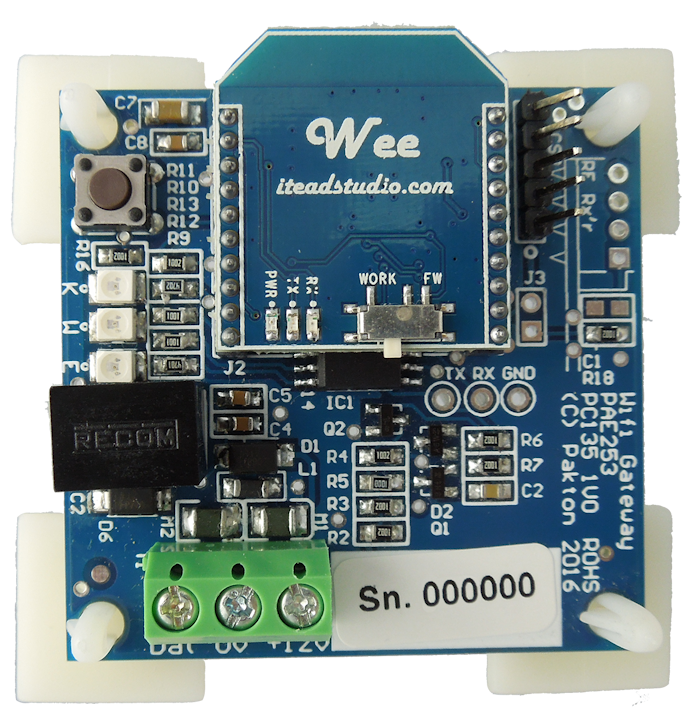
The PTE0253 JVA Wi-Fi Gateway connects a group of JVA Z Series devices to Cloud Router™.
Information is transferred via an existing 2.4GHz Wi-Fi network.
This quick-start guide discusses how to connect and configure the PTE0253 Wi-Fi Gateway.
| Electrical Supply | 12 V DC Power comes from the Keypad Bus connection |
|---|---|
| Communications | Keypad Bus Up to 15 Z Series devices can be connected Unit uses Keypad ID 6 |
| Wi-Fi | 2.4GHz 802.11 b/g/n |
| Wi-Fi Security | Open, WEP, WPA/WPA2 PSK |
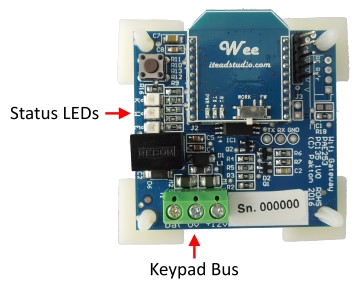
| K | Blinks when the unit is communicating with Z series devices |
|---|---|
| W | Indicates the state of the Wi-Fi connection |
| E | Flashes an error code if there is a problem with the unit or group |
Important: Make sure one Z Series device is programmed with ID 1.
Ensure the Z Series devices are configured appropriately. Power up all
devices and make sure they are disarmed.
Refer to device manuals found at
http://www.jva-fence.com/downloads.php
If any keypads are connected to the group, make sure they are not on keypad ID 6.
Make sure the Wi-Fi Gateway is in range of your Wi-Fi network.
Confirm the Wi-Fi network has a working
internet connection.
Know the network name (SSID) and password.
Connect the Keypad Bus wires from the energizer to the Wi-Fi Gateway.
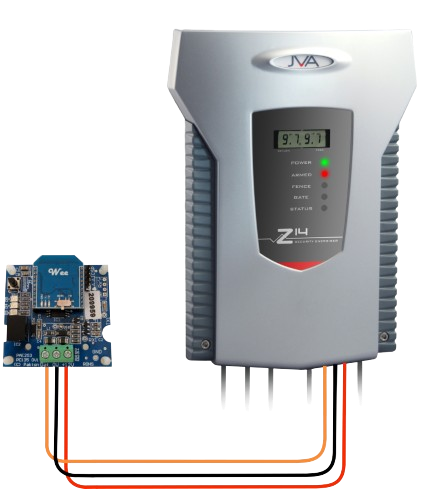
Confirm the ‘K’ light is flashing, and the ‘E’ light is not flashing.
It is recommended to complete Wi-Fi set-up before final installation, in case access to the
push button is required.
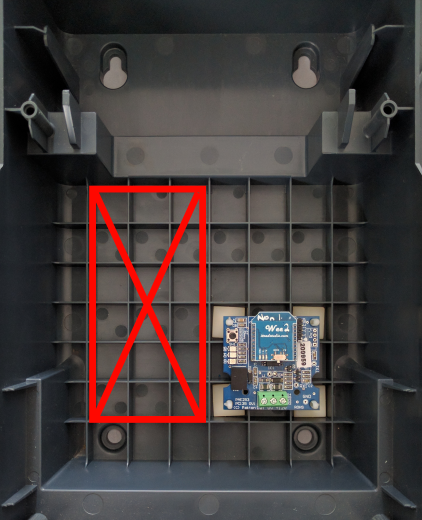
The Wi-Fi Gateway is fitted with adhesive feet and can be fitted to an enclosure wall, or inside a Z series energizer
case.
If installed inside a Z series case, make sure it is
not placed within the red ‘X’, as it will be
too close to high
voltage elements and could result in damage to the Wi-Fi Gateway or energizer.
Android Users: Install and run the App from the Google play store

Android Users, PC Users, iOS Users: Use the Virtual Keypad by following the process below:
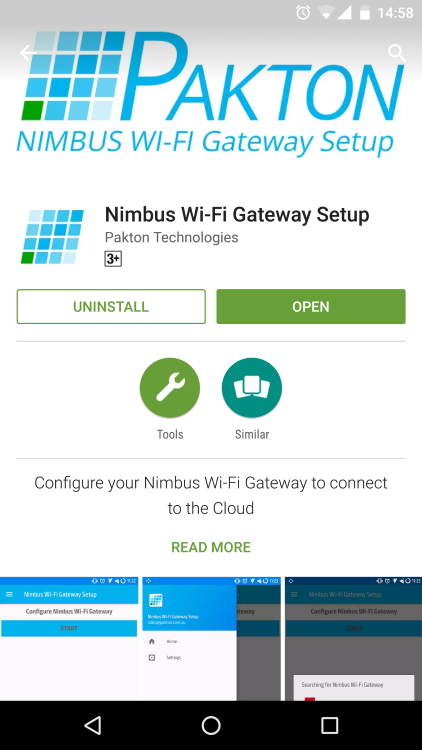
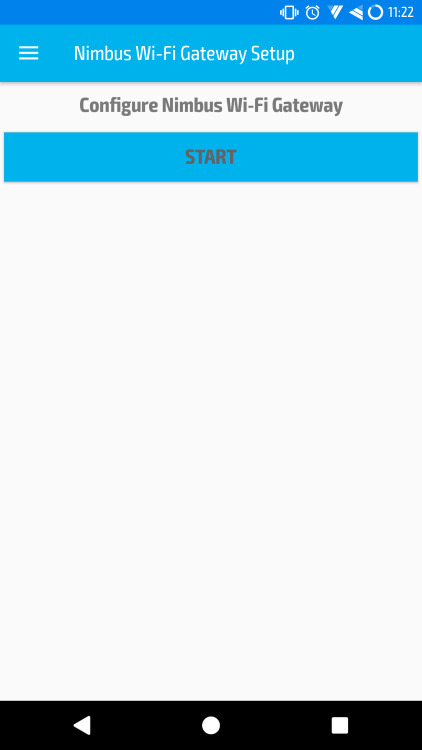
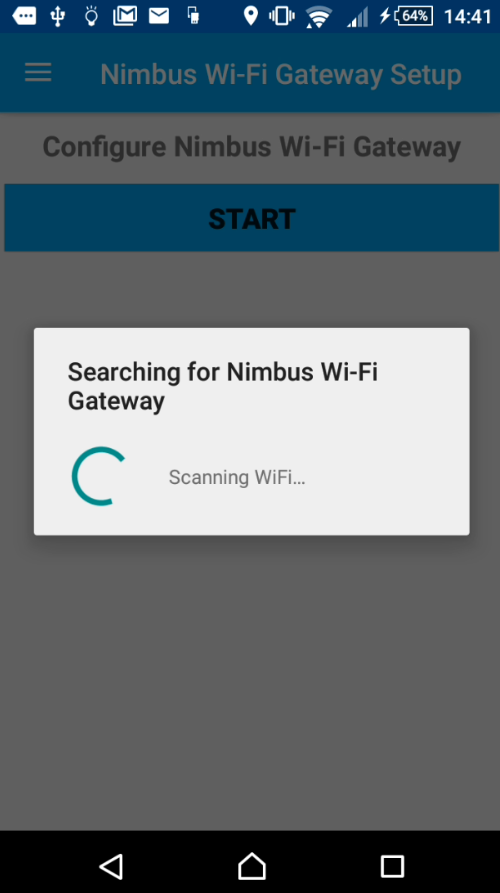
Press ‘Start’. The app will begin searching for your Wi-Fi Gateway.
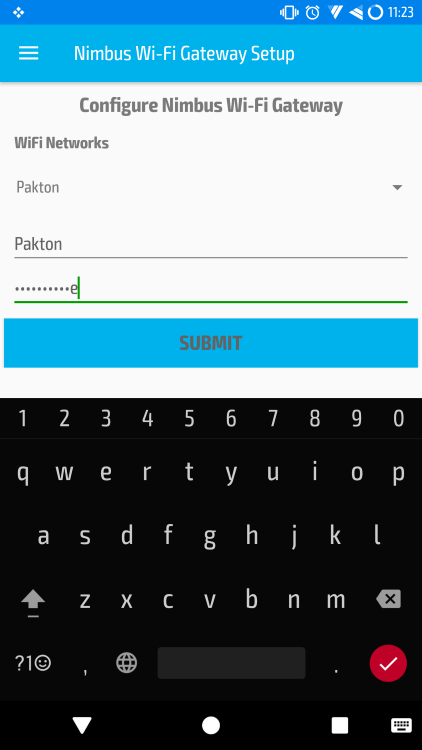
Choose your Wi-Fi network name (SSID) from the drop-down list.
Enter your Wi-Fi network password. Press ‘Submit’.
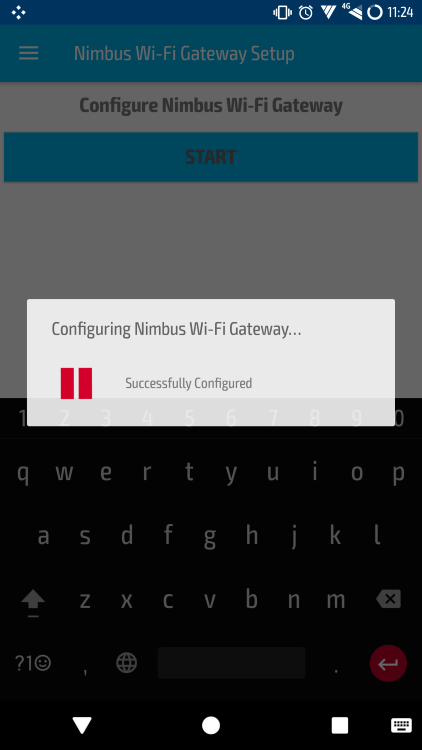
The ‘W’ LED on the Wi-Fi Gateway will begin blinking twice to indicate it is trying to connect to
your Wi-Fi network.
It should change to a slow blink within 30 seconds. If it does not, the most
common cause is an incorrect password.
Remove power from the connected energizer, hold
down the Gateway push button,
re-apply power to the energizer, wait until the Gateway LEDs
blink rapidly, then release the push button.
You can now repeat the Wi-Fi setup procedure.
If the ‘W’ LED is blinking slowly, the Wi-Fi Gateway is connected to the Cloud Router™.
Go to www.jva-fence.com/security/cloudrouter for the Cloud Router™ setup guide.
| Failure | Probable cause | Solution |
|---|---|---|
| No lights on | Connected energizer is off Power is not connected Power wires are reversed |
Connect power to energizer Check keypad bus +12V and GND connections Check voltage at keypad bus +12V and GND connections with a multimeter |
| LED 'K' does not flash | Keypad bus is not connected | Check the keypad bus DATA and GND connections |
| LED 'W' flashes once | Wi-Fi not configured | Configure the Gateway using the Nimbus Wi-Fi Gateway Setup app. See section ‘Wi-Fi Set-up’ |
| LED 'W' flashes twice App can’t find gateway |
Incorrect Wi-Fi password Gateway already (incorrectly) configured |
Reset Gateway (see below) and reconfigure as per section ‘Wi-Fi Set-up’ |
| App does not show Wi-Fi networks | Poor signal strength | Move the Wi-Fi router, change antennas or install a Wi-Fi range extender |
| Unit does not control the energizer(s) | Master energizer is not polling Gateway | Reset the group master (ID 1) by turning off and on again |
| Another keypad or keypad device is connected with keypad ID 6 | Disconnect the other keypad, or change its keypad ID to something other than 6 | |
| Group configured incorrectly | Ensure at least one energizer as master (device ID 1) and any others have unique device IDs of 2 or more |
If the unit is still not working correctly, contact your nearest JVA distributor for technical support.
Replacing an existing Wi-Fi Gateway
If the Wi-Fi configuration is incorrect, the Gateway will need to be reset.
If the Gateway has been successfully reset, the 'W' light will be flashing once.
Wi-Fi Gateway Set-up
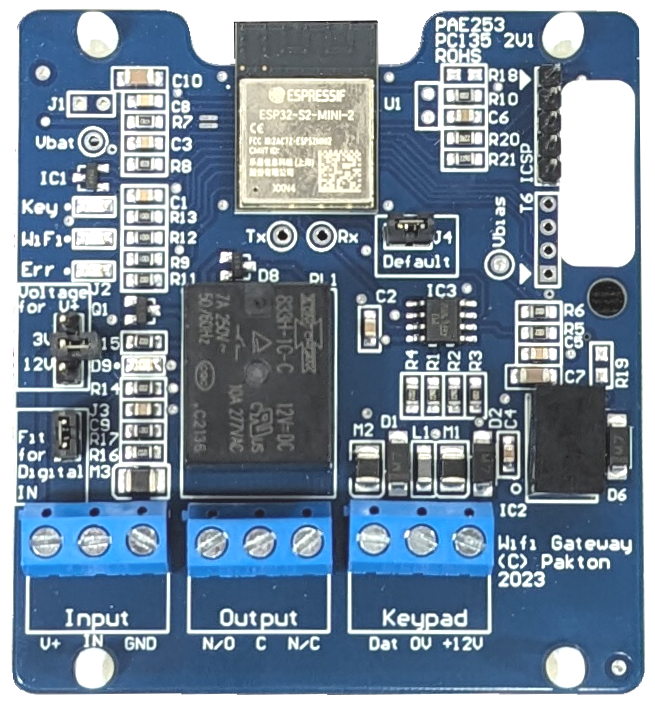
The PTE0253 V2 JVA Wi-Fi Gateway connects a group of JVA Z Series devices to Cloud Router™.
Information is transferred via an existing 2.4GHz Wi-Fi network.
This quick-start guide discusses how to connect and configure the Wi-Fi Gateway.
| Electrical Supply | 12 V DC Power comes from the Keypad Bus connection |
|---|---|
| Communications | Keypad Bus Up to 15 Z Series devices can be connected Unit uses Keypad ID 2 - this is configurable |
| Wi-Fi | 2.4GHz 802.11 b/g/n |
| Wi-Fi Security | WPA/WPA2 PSK |
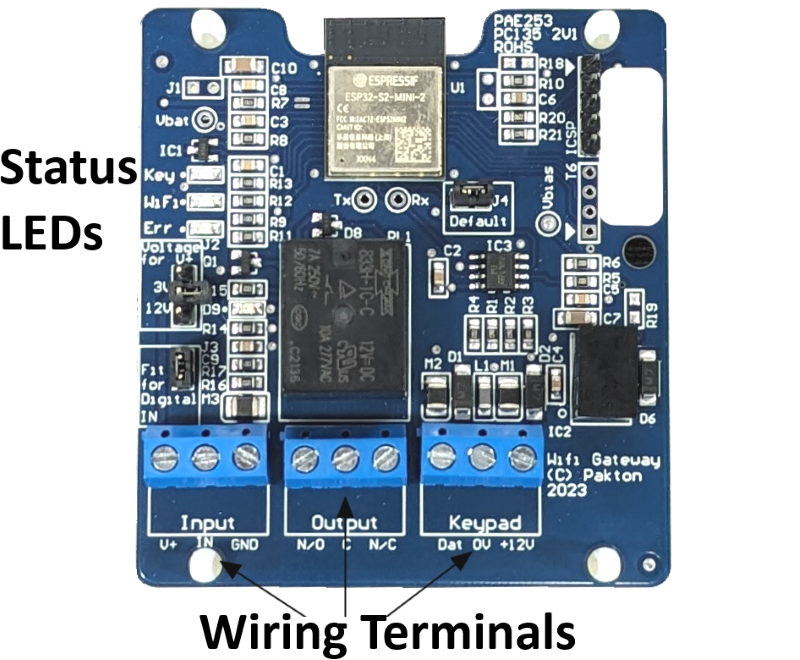
| WiFi |
1 Flash - Access Point is read for connection 2 Flash - Device connected to Access Point 3 Flash - Connected to LAN via Wi-Fi Slow ON-OFF-ON - Connected to Server |
|---|---|
| Key | Data is seen on the Keypad Bus |
| Err | Error codes |
Important: Make sure one Z Series device is programmed with ID 1.
Ensure the Z Series devices are configured appropriately.
Refer to device manuals found at http://www.jva-fence.com/downloads.php
If any keypads are connected to the group, make sure they are not on keypad ID 2.
Make sure the Wi-Fi Gateway is in range of your Wi-Fi network.
Confirm the Wi-Fi network has a working internet connection.
Know the network name (SSID) and password.
Connect 3 wires into the Wi-Fi Gateway Keypad Bus terminals (Dat, 0V, +12V).
Ensure the energizer is not powered: turn off mains; disconnect the +ve battery lead.
Connect the 3 wires into the energizer Keypad Bus terminal.
Review the wiring and then connect the +ve battery lead and turn on mains.
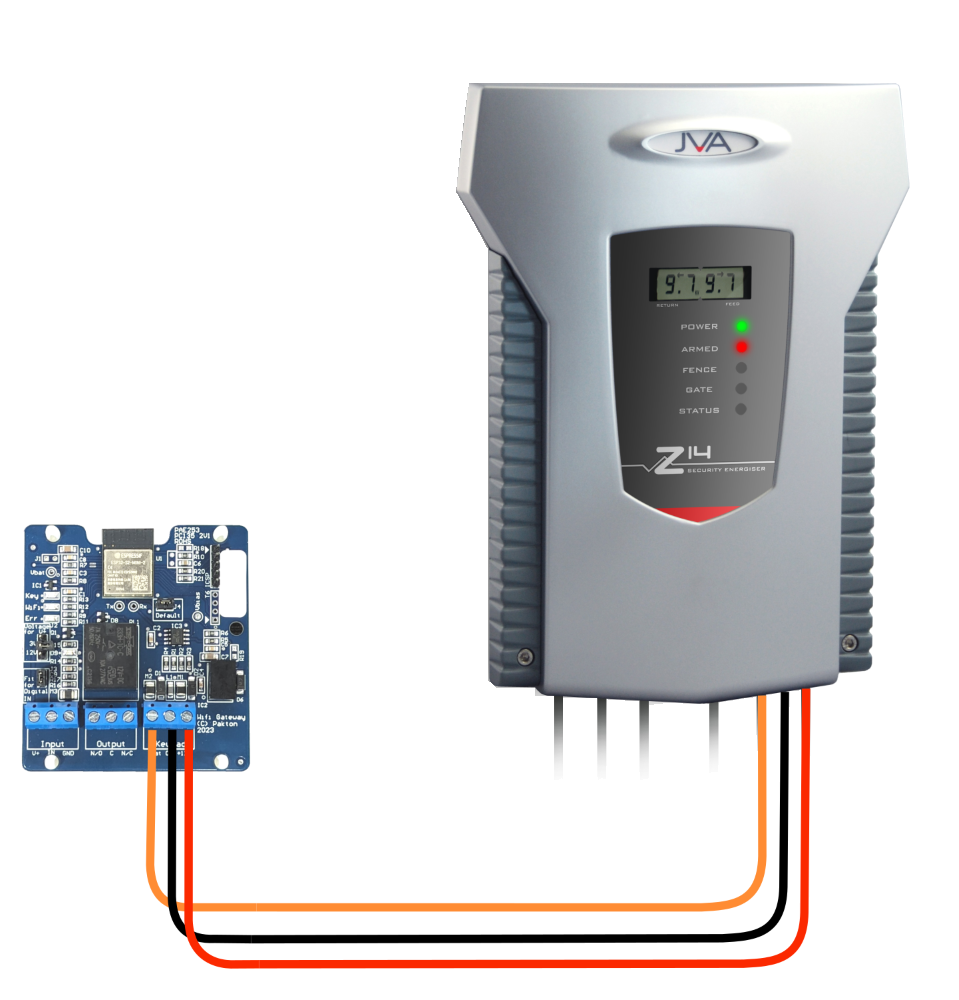
Confirm the ‘Key’ LED is flashing, and the ‘Err’ LED is not flashing.
The Wi-Fi Gateway is configured using a Virtual Keypad accessed via a PC,
Smart Phone or Tablet using a 2.4GHz Wi-Fi link.
To connect to the VKP on a smart phone: scan the QR code in the enclosure cover.
The phone may ask to "Sign-In", click this and the phone browser should automatically open
and be re-directed to the VKP home page.
Otherwise, follow the steps below.
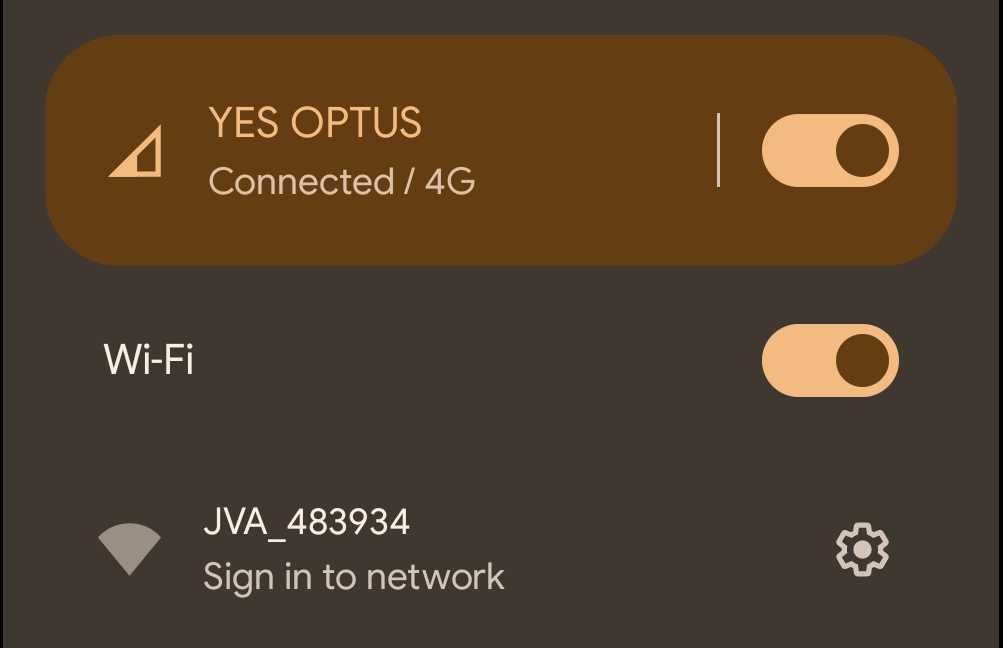
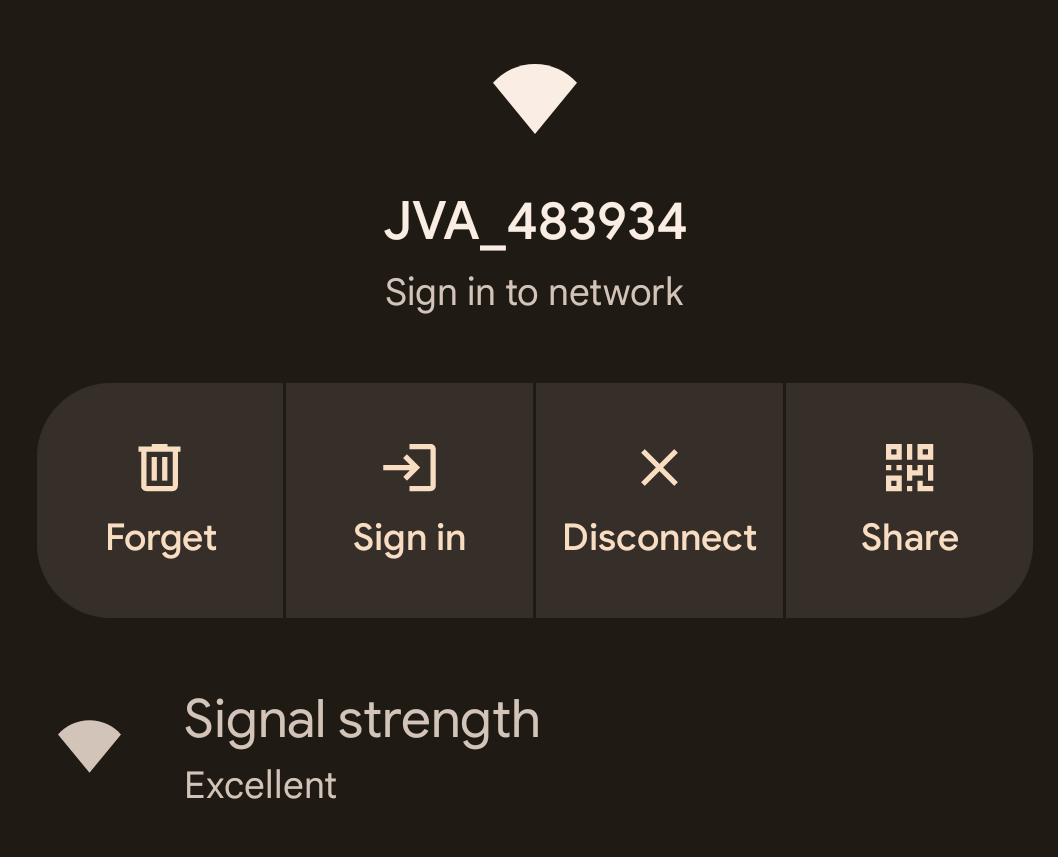


The Virtual Keypad (VKP) page will be displayed.
On some devices this page may need to be refreshed once to download all components to the device.

Open the 'Wi-Fi Settings' Page to connect the Gateway to a Wi-Fi Access Point

The Wi-Fi settings page is used to connect the Wi-Fi Gateway to a
2.4GHz Access Point (AP).
Pressing the Scan button will start the search for nearby Access Points, which will be displayed in the list.
The signal strength of each AP will be listed next to the SSID.
When comparing APs, the smaller dB value indicates a stronger signal. For example -56dB is stronger than -89dB.
Select the SSID from the list and then enter the AP password into the box.
If privacy is needed when entering the password, click on the eye icon.
Press the Connect button to complete the process. The Gateway will restart and the PC/Phone will be disconnected.
After the restart, re-connect to the Wi-Fi Gateway to again access the VKP again.
This page will now display the IP Address that has been assigned by the Access Point.
The AP Password will now be hidden, clicking on the eye will display “Not The Password” here.
Go to www.jva-fence.com/security/cloudrouter for the Cloud Router™ setup guide.
| Failure | Probable cause | Solution |
|---|---|---|
| No lights on | Connected energizer is off Power is not connected Power wires are reversed |
Connect power to energizer Check keypad bus +12V and GND connections Check voltage at keypad bus +12V and GND connections with a multimeter |
| LED 'Key' does not flash | Keypad bus is not connected | Check the keypad bus DATA and GND connections |
| LED 'W' flashes once | Wi-Fi not configured | Configure the Gateway using the Nimbus Wi-Fi Gateway Setup app. See section ‘Wi-Fi Set-up’ |
| LED 'WiFi' flashes twice Wi-Fi Gateway cannot connect to Access Point |
Incorrect Wi-Fi password Gateway already (incorrectly) configured |
Reset the Gateway (see below) and reconfigure as per section ‘Wi-Fi Set-up’ |
| LED 'WiFi' flashes three times Wi-Fi Gateway cannot connect to Cloud Server |
Access Point does not have internet |
Confirm that the Access Point can connect to the internet using a phone/tablet |
| App does not show Wi-Fi networks | Poor signal strength | Move the Wi-Fi router, change antennas or install a Wi-Fi range extender |
| Unit does not control the energizer(s) | Master energizer is not polling Gateway | Reset the group master (ID 1) by turning off and on again |
| Another keypad or keypad device is connected with keypad ID 6 | Disconnect the other keypad, or change its keypad ID to something other than 6 | |
| Group configured incorrectly | Ensure at least one energizer as master (device ID 1) and any others have unique device IDs of 2 or more |
If the unit is still not working correctly, contact your nearest JVA distributor for technical support.
Replacing an existing Wi-Fi Gateway
If the Wi-Fi configuration is incorrect, the Gateway will need to be reset.
If the Gateway has been successfully reset, the 'W' light will be flashing once.
Wi-Fi Gateway Set-up
If you have questions or need further assistance, please email us at sales@jva-fence.com.au or call:
| Region | Number |
|---|---|
| Australia | 07 3103 0582 |
| Chile | 02 2211 80 00 |
| South Africa | 0861 782 349 |
| United States | 512 413 8661 |
| World Wide | +61 7 3103 0582 |
For more information on our range of electric fence products visit the JVA website at www.jva-fence.com